Expedition and Alpine Climbing - Information and Beta
This article details some of my knowledge learned about alpine climbing expeditions (and alpinism) over the last 12 years. I’m no expert, and this is only my opinion, but here you go…
This article is broken into:
Introduction
Objectives
Logistics
Preparation
Grants
Fitness
Gear
Base Camp Living
Example Climbing Gear
Acclimatising
Staying Healthy
Climbing
Sleeping
The Mind
Timings
Expedition Reports and Articles
Country-Specific Information
To Do Beforehand
Introduction
By ‘expeditions,’ I mean going to a remote or adventurous area to try an alpine climbing objective, for about 1 - 2 months, and usually involving a Base Camp in the mountains (as opposed to a nearby town). Example locations include Alaska, where you have a Base Camp on snow or a glacier; or Pakistan, India and Nepal, where you have high altitude objectives, and a Base Camp in the mountains.
My definition of an expedition might be different to others, but in general I think going to the Patagonian town of El Chalten is not an expedition but instead a ‘trip.’ This is the same as alpinism in the Canadian Rockies. Both are world-class destinations with really hard routes, and no less impressive than climbing on an expedition; but simply that they have a different feel and an easier set of logistics compared to going to a less-developed country for alpine climbing in the Himalayas, for example. There are, of course, some places in Patagonia and the Rockies which I would see as being expeditions.
It’s also worth noting that I don’t place too much emphasis on a First Ascent - an early repeat of a moderate-altitude technical route is likely to be much harder than a high-altitude snowy FA.
Although commercial climbs and ascents of peaks like Everest are still expeditions, I’m not referring to them in this blog post.
Why go? There are many cool things about going on an expedition: to access bigger mountains or wilder places. I guess it’s also the essence of alpinism: climbing a big route at high altitude in the ‘Greater Ranges’ (the Himalayas, Karakoram and similar) with a good friend(s) can be incredibly rewarding and leave you very satisfied for a long time! However, expeditions can be very expensive, unsuccessful due to numerous reasons, and time-consuming. Remember, 50% of the time you might not climb anything ‘significant,’ but you’ll certainly have fun and learn a lot in the process.
What’s alpinism? Here’s the first of many external links, where other people have said it better: Nick Bullock’s definition on alpinism
Partners: one of the initial cruxes is to find a partner. Try to go with a good friend/friends who you know well and trust, and already have a strong partnership in the mountains. Climb lots of alpine routes with them, and before an expedition you should clearly discuss your objectives and the style in which you want to climb. You’re going to spend the next ~month with them, so know their personality, strengths and weaknesses - and they know you. Look after them, and hopefully they’ll look after you!

The Latok group in Pakistan
Objectives
Although this is an entire blog in its own right, I’ll keep it simple. For your first expeditions, try something that’s a logical choice considering your existing climbing experience and level. Don’t attempt anything too high if you’ve only climbed in the Alps (around 6000 metres is a great start). Accept that expeditions are the same as climbing grades: take your time and progress slowly. If you’re keen to climb in the long term then you’ve got plenty of time.
Find an objective that attracts you, such as a cool-looking mountain or an interesting region to visit. Ask other climbers for information or what they’d recommend. Do some research: you’d be amazed at the rabbit hole you can go down with just the name of one mountain. For example, Hagshu and surrounding peaks in India, the Langtang region in Nepal, or the Charakusa valley in Pakistan. The American Alpine Journal is a great resource. Oh, and ideally don’t have the crux at the top of your planned objective!
Alaska is a great place to start because the travel is easy, there’s plenty of information online, and it’s in a developed country; plus everyone speaks English. However, the climbing is real, high-quality, and remote; living on a glacier is hardcore; and the logistics are a bit of a faff (but in general very easy). See the end of this article for an example expedition to each country.
Logistics
The major logistics are:
1. getting into the country
2. getting to the mountain/Base Camp, and
3. navigating the Peak Permits and bureaucracy.
For the first point, getting into the country can be a headache. I remember having to post my passport off with loads of accompanying documents to get a visa for Pakistan, but nowadays you can get most visas online (e.g. e-visa for India, ESTA for USA, etc). This is a separate blog in itself but basically play the game (i.e. write the correct answers in your application), do it well in advance, and ask others for advice!
When buying flights, avoid LastMinute.com and similar companies which offer ‘great’ deals - you’ll probably have to pay loads extra for baggage, and they’re cowboys to deal with. The airline with the best baggage policy is usually the one you want to buy your tickets with. Get good at reading the small print about baggage. Turkish Airlines used to have a free ski bag which was brilliant (but have stopped this as of mid 2024, unfortunately).
For points 2. and 3., these are possible to overcome without the help of an in-country agent. You’d be amazed - you can usually rock up to the last village before the mountains and ask around for some help carrying your bags up the hill. You’ll have a crowd in no time! But I’m told this method might delay your trip, make things stressful (especially if you don’t speak the language) and you might get charged a higher price (despite trying to save money by not using an agent).
I’ve always used an agent because they make the trip run smoothly, easily solve unexpected issues (of which there are always many), and it gives a bit of money back into the local economy.
My advice is to email an agent (ask other climbers who they recommend) with some details about your planned trip (duration, location, team members, objective etc). They’ll reply with a quote. If you both agree, the agent will then usually handle all in-country logistics such as travel and permits.

Checking gear at the start of a trip
Preparation
Here’s a few things which are useful to do:
Double-check exactly what people are bringing. Use Google Sheets so everyone can view and edit a spreadsheet.
Bring lots of $ in cash - this is particularly useful for Pakistan, India and Nepal. About $500 - $1000 in large/small denominations is good.
Keep track of your visas. Apply well in advance, and if you haven’t heard anything in a week, chase it.
Once in country, try to enjoy the new place but also try to move towards the mountains. In some countries they’re happy to take a few days to do paperwork stuff, which can waste time. Try to keep things moving… but also remember you’re pretty helpless if the powers-that-be decide to do things their way!
Closer to the mountains, you’ll meet the expedition cook. Check with them about what they’re planning to make and bring to the base camp. They might think you want french fries and pizzas, but I always stress I’d like to eat simple, healthy, local food, and a predominately vegetarian diet.
Check the gas canisters fit your stove, are the correct weight, and of good quality (the agent will usually try to supply or organise buying these).
Check your objective with the people that have issued the permit (e.g. Indian Mountaineering Federation or Nepalese Ministry of Tourism). Ask if other climbers will be in the same area.
Grants
Here in the UK, we’re very fortunate to have grants. This is literally free money to go climbing. The three major ones are:
The most important deadline is 31st January. Focus on meeting the criteria of each grant (e.g. some grants look for difficult climbing, some look for exploration, etc). Here’s a list of other grants on the BMC website. Membership to these clubs (around ~£50) is required.
The Austrian Alpine Club (UK section) also has generous grants which are worth applying for. Membership (around ~£50) required.
Fitness
Again, this is a blog in itself, but the simple answer is you need to be as fit and healthy as possible. For my expeditions I think it’s important to have a high technical standard of climbing alongside a big cardio base (which is hard to do!). I aim to be able to climb steep, bullet-hard ice; trad-protected rock and mixed pitches; slog up moderate snow slopes; and continue this for many days in a row.
I’ve had training programmes over the years but if the weather’s good I prefer to go alpine climbing rather than train indoors. However, I’ve been lucky to have easy access to the mountains, a variety of routes and many types of climbing nearby, so I can ‘train’ in the real world quite effectively. I also do lots of long runs, some trad and mixed climbing, plus some dry tooling.
My best advice is to go climbing in the mountains as much as possible (and do plenty of long runs in the mountains) before an expedition, but some people will prefer to follow a training programme. Don’t underestimate the importance of climbing with a heavy pack, either. Make sure 10 kilos doesn’t slow you down on the approach and you can still do long, easy scrambles; you don’t want to be tired before the climbing even starts.
Look at how you’ve trained in the past and use it to your advantage.
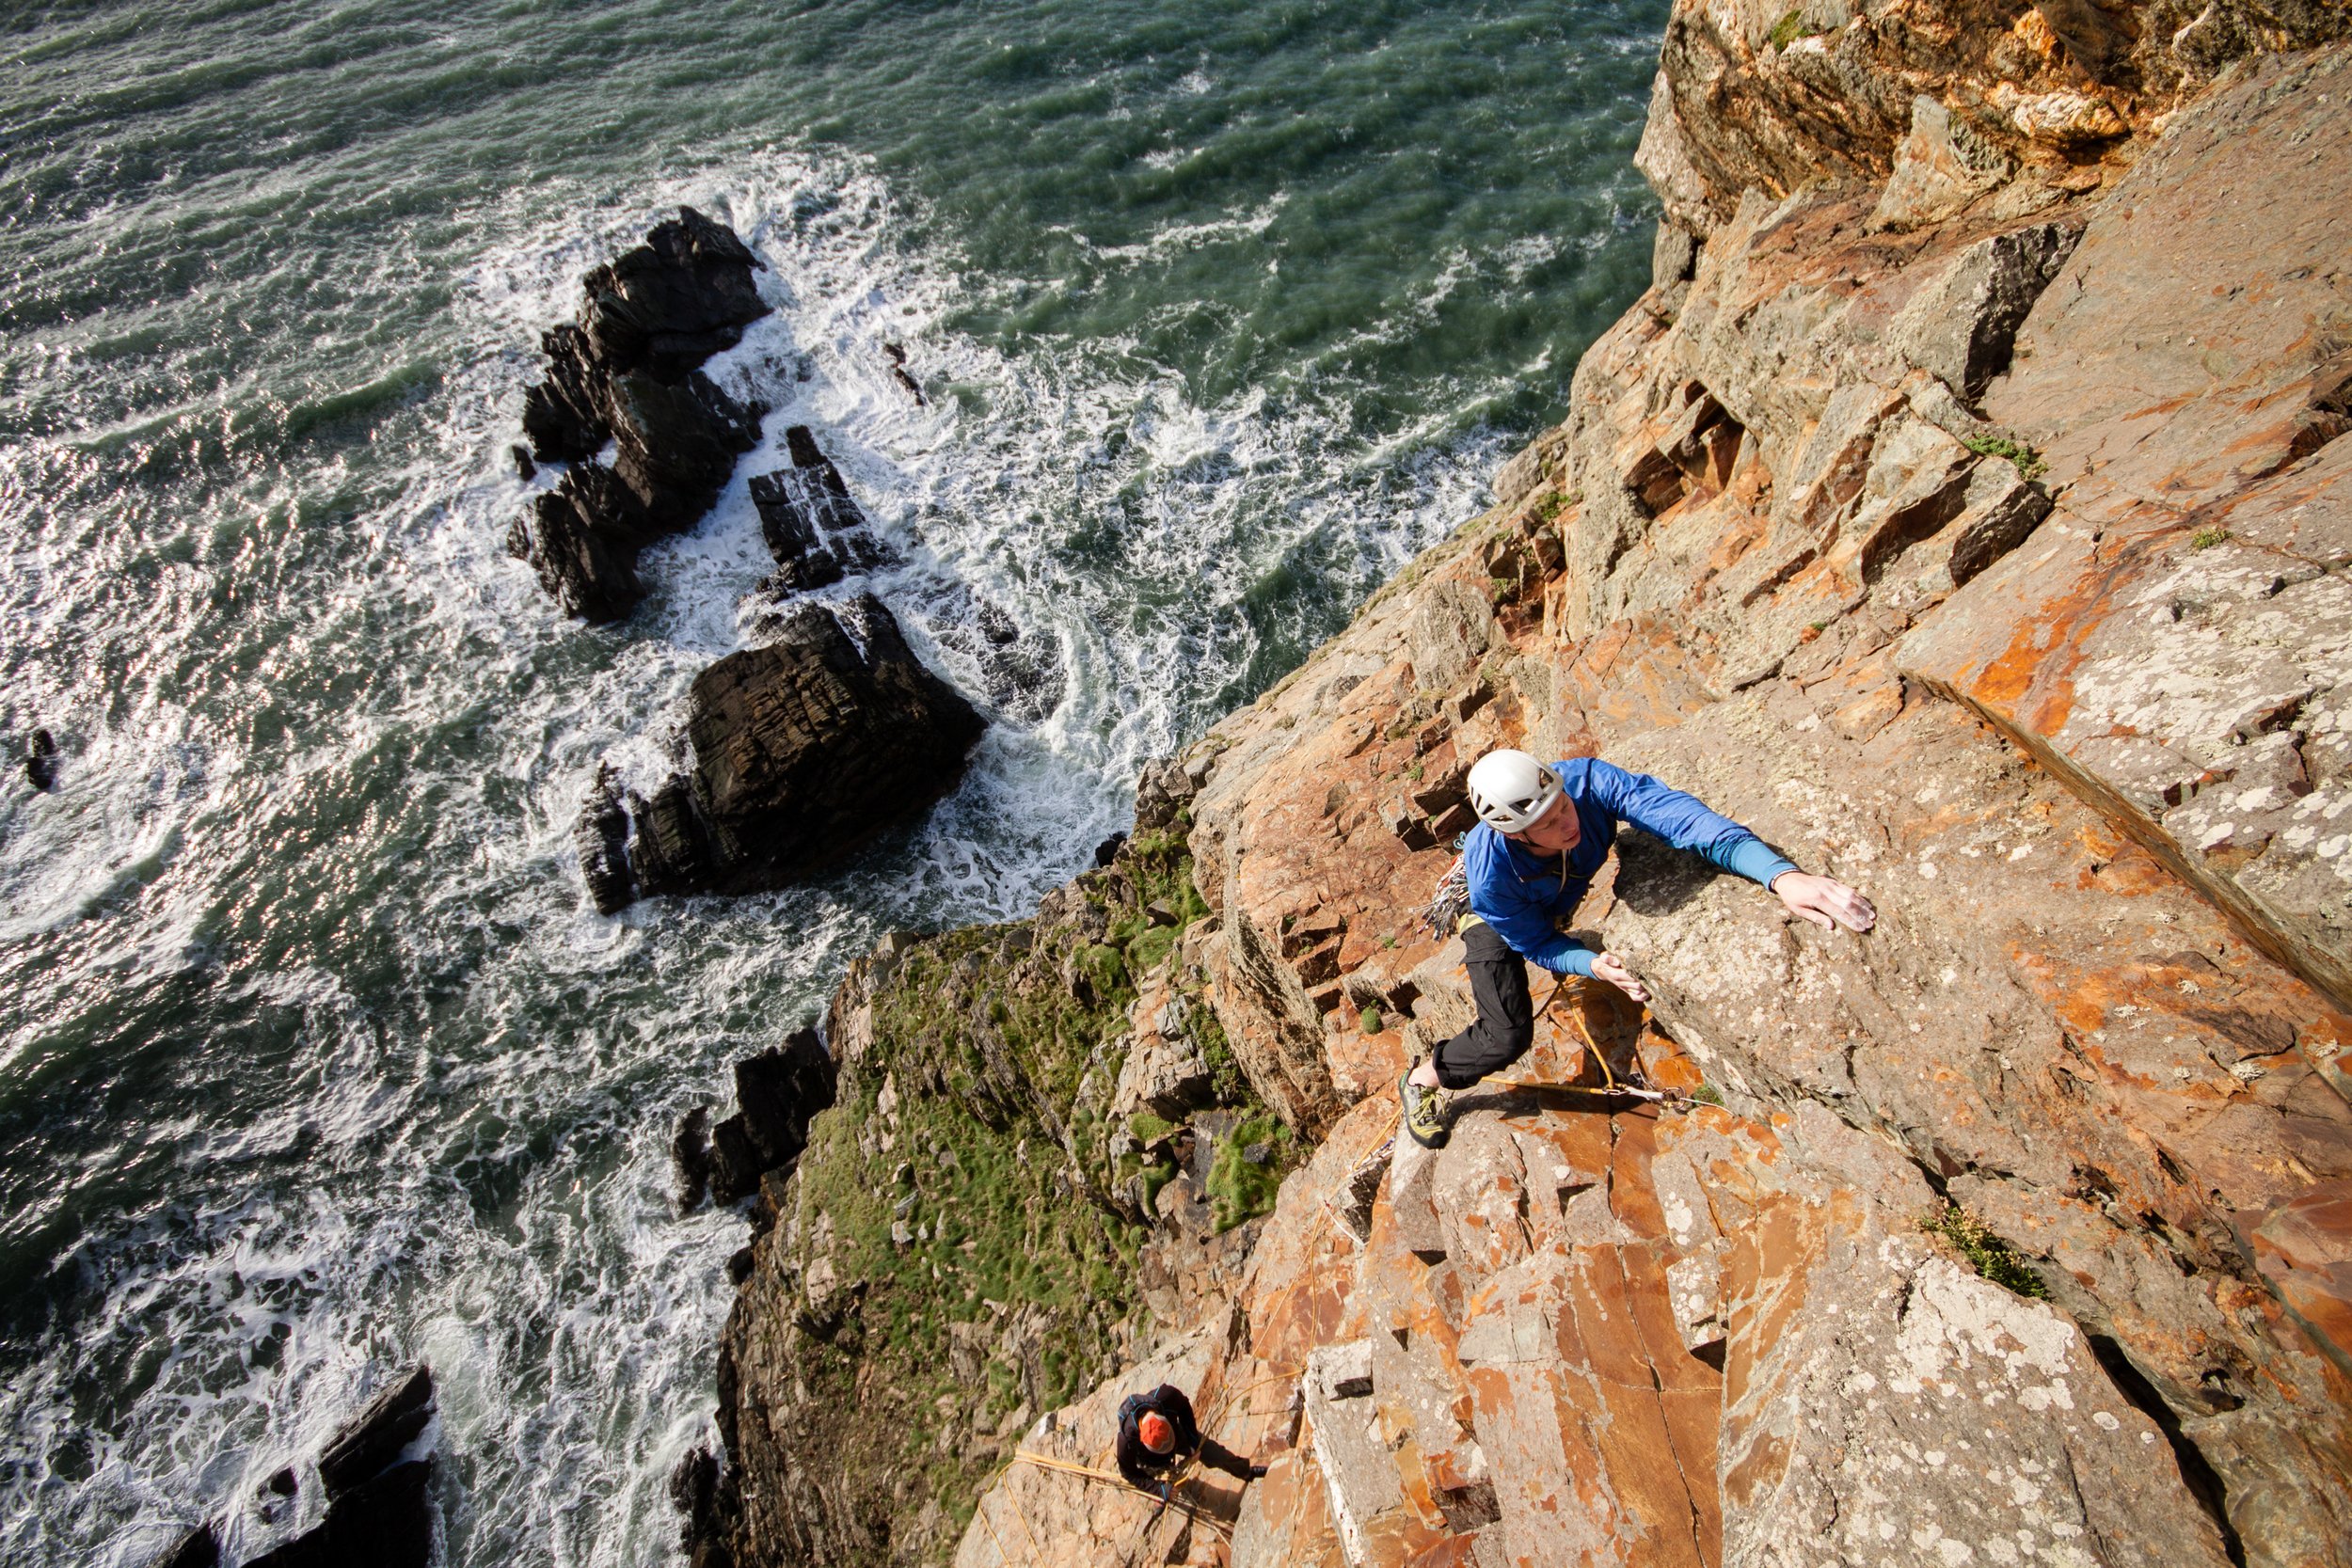
Climbing lots of different routes in lots of different locations helps you to deal with whatever climbing you might find on an expedition. Photo: Dan Lane
Gear
Here’s a kit list for a standard expedition to Pakistan (if there’s such a thing). In general, I like to bring a good selection of gear to Base Camp, since it gives you options and you have spares if something breaks.
These are some of the things I now bring on every trip:
Hand warmers (I don’t usually take them on a route, but when I do I’m very glad).
A watch with a loud alarm and the ability to tell you where you are, your altitude, and ideally make tracks which you can follow back and drop points/pins which you can find again. I use the Suunto Spartan Ultra; one of the best features is a loud/vibrating alarm to wake you up in the morning.
Hand-held weighing scales (depending on how obsessive about weight you are!)
Lots of gear. For example, bring lots of pegs, cord, cams, 3 sets of wires, 2 v-threaders, 2 knives, 2 belay plates, spare axes and crampons, (in case you lose or break something/bail off a route and leave lots of gear), fresh axe picks and front points etc. Don’t forget to bring a simple file for sharpening things in Base Camp, and a set of Allen keys to tighten all your nuts and bolts before climbing.
Totem cams will freeze solid, particularly in places like Alaska.
I take several camera SD cards and will use a new one for when I go climbing, rather than having everything on one card.
Bring several rope combinations. Double ropes work really well in most situations (it’s safer to climb with two ropes, you can better protect meandering pitches, it’s easier to rappel, and you can climb as a team of three), but single-and-tag can work best if you’re a pair and want to haul often, or don’t intend to rappel much. In general, I prefer the Petzl RAD line because you can use it as a rappel rope (as opposed to the PUR line, which I almost exclusively use as a pull-rope when rappelling, and is therefore slower and a faff). You can fly with ropes in your hand luggage to save weight on your checked hold bags - I’ve done it enough times between Europe and Asia without problems that I’m now confident in writing this, although one day I’m sure I’ll meet the wrong security guard and get it confiscated, so don’t put all your ropes in there. But do not fly with ropes in your hand luggage in South America.
Lots of ‘climbing food’ from home, such as energy gels, bars, nuts, cheese, saucisson, chocolate, electrolyte tablets, etc., that you like to eat in the mountains. Some multi-vitamins and recovery drinks are usually welcome in Base Camp.
Magnesium, zinc and Vitamin B tablets help avoid cramp.
The Beal Escaper can work well in some situations. Make your abseils clean i.e. don’t let your rope rub against too many rocks. The extra friction will mean the Escaper doesn’t work when you come to pull it. You also don’t need to rig it all the way through, if you want to avoid pulling it 2000 times.
Take a lightweight axe like the Petzl Gully if you plan to stash your climbing axes at the base of the route.
A Zinc Stick or thick suncream is a really good idea. I use the skin-coloured 8882 High Altitude version. Bring lots of sun cream and lip balm (1 tube per week).
Bring goggles. I bring them on every trip but haven’t used them in the mountains outside of Scotland once. However, I know some people rave about them.
A selection of packs (e.g. a Tupilak 30L and 45L, plus a giant comfortable backpack for acclimatising).
Walking poles (proper ones with big snow baskets; lightweight or carbon ones will break).
Binoculars for scoping out the route.
Paraglider - I’ve brought my wing on three expeditions but have concluded it’s not worth it. It’s real-world flying and I’m not an expert pilot; the take-off, wind, clouds, weather or landing has usually been less-than-perfect; imagine how annoyed you’d be if you sprained your ankle; and it requires extra permits in some places in Nepal and Pakistan. I love the idea of flying down to base camp after acclimatising but it’s never worked out for me. Keep it simple: you’re there to climb.
Base Camp Living
Ideally, put your base camp at the last comfortable and grassy spot before the glacier. Your porters will likely know the best place, but essentially you want it to be a nice place to live and around 4000 metres in altitude.
Tipping your porters seems almost obligatory nowadays. Careful because you’ll probably tip them ‘per load’ (usually 25kg) rather than per porter or donkey. Check with your agent and guide about what’s the norm. At the end of the trip I usually give 150 USD to the cook and 100 USD to the assistant cook.
Bring:
Good climbing shoes, brush and lots of chalk for bouldering
A comfy mattress for base camp. You’re going to sleep on it for a month…
A cricket bat/football/slingshot for entertainment
Flip flops for sunny weather and down boots for snow
Umbrella (particularly useful in Pakistan to shelter from the sweltering sun)
Some protein powder, recovery drink, fruit shakes and hot chocolate powder
Books or Kindle. I’ve enjoyed the following: The Count of Monte Cristo; Deep Play (Paul Pritchard); Beyond Limits (Steve McClure); Still Life; A Short History of Nearly Everything (Bill Bryson); Beyond the Mountain; The Art of Freedom; Revelations (Jerry Moffat); The Lincoln Highway; Survival is not Assured - Jim Donini (Geoff Powter); Andrej Stremfelj books; all Alpinist magazines.
iPod/tablet with lots of films on it. Find your favourite podcasts and download a bunch. Watch out because Spotify will log you out after one month offline.
A good repair kit including Seamgrip, duct tape, spare buckles, extra lighters, Betrafol or similar, cable ties, multi tool, penknife, sewing kit, string, cord, superglue, crampon spares (heel and toe bails, fresh front points etc), ice axe spares etc.
A small base camp headtorch. Keep your climbing headtorch safe and fully charged.
Bring a shovel (or two). If it snows loads at base camp, you’ll need it. On a couple of routes I’ve wished I had brought a lightweight shovel (such as the ATK Race Rescue Snow Carbon shovel); or brought one and it’s been worth the weight; or fitted the shovel onto the handle of an ice axe at the bivy.
A small solar panel and power bank battery. They’re always useful. I think a 30W three-panel solar and a ~10,000 mAh power bank are sufficient. You’re only going to be charging cameras, headtorches, phones and an InReach. I use something like the Anker Solix PS30 panel. If you have a large (e.g. 20,000 mAh) power bank it won’t be charged by anything other than a generator and an Apple laptop-style charger, or a massive solar panel (which might break). Keep it simple and have a small or medium-sized solar panel and power bank.
A speaker
An empty pillow case, which you can then stuff with clothes and use as a pillow once in BC.
Having a dining tent and chairs, separate kitchen tent and individual sleeping tents are very nice. It’s worth checking this with your agent beforehand. I couldn’t sit on the floor for a month.
Also when you first meet your cook, it’s worth checking what they’re planning to make/bringing. I like to eat as the locals do, which means no pizza or chips. You can suggest, in a friendly way, taking more local produce, lots of fruit and vegetables.
Double check the gas canisters for your climbing stove with your agent, and buy more than you think! You don’t want to run out of gas.
Example Climbing Gear:
On trips to the Greater Ranges, climbing technical routes up to around 7000 metres, I might wear/carry:
La Sportiva G2 Evo boots
Smartwool Mountain socks x2
Mountain Equipment (ME) Eclipse salopettes
ME Tupilak Atmo pants
ME Compressor pants
ME Eclipse hooded zip tee
ME Transition ‘Lite’ mid layer (or similar)
ME Tupialk Atmo jacket
ME Kryos jacket
ME Eclipse beanie
Buff
ME Lead gloves e.g. Direkt gauntlet
ME Mid-sized gloves e.g. Supercouloir gauntlets
ME Citadel mitts (only the outers)
ME Tupilak pant - depending on size
Petzl Axes e.g. Nomic
Petzl Dart crampons
Petzl Sitta harness
Petzl Reverso belay plate + prussiks
Petzl V-Link leashes
Petzl Sirocco helmet
Petzl ropes (e.g. Volta Guide + tagline; Paso Guide ropes x2)
Petzl Swift RL headtorch + spare battery
Rack
Topos, maps
Food
MSR 2L Dromedary water bottle
Julbo Shield sunglasses
sun cream, lip stuff
Camera e.g. Sony RX100 V
Watch e.g. Suunto Spartan Ultra
MSR Reactor stove, gas, lighters, spoon, freeze dried gas heater pouch
ME Firelite or Fireflash sleeping bag
Sleeping mat e.g. Thermarest Z Lite
Single skin tent or bivy bag
Random extras which may include small File, iPod Shuffle, rock shoes, chalk bag, first aid kit, Garmin InReach etc

Packing and re-packing before a route.
Acclimatising
The general rule is to spend at least one night 1000 metres below your route’s summit altitude. For example, if the summit is 7000 metres, try to spend a minimum of one night at 6000m.
Take is easy whilst acclimatising. Your body is already stressed from the altitude so chill out and don’t try to climb hard.
Take lots of luxuries and try to sleep well. Bring snacks from home/you want to eat when you have no appetite, like cheese, dried meat (salami, saucisson or speck last a long time and don’t need to be refrigerated), chocolate, nice soups, Angel Delight, coffee and Aeropress/percolator, tea, peanut butter etc. A book and sudoku are useful.
Approach skis (with climbing boot bindings like Silvretta 500s) or snow shoes can work really well for acclimatising in certain situations e.g. the Choktoi glacier was long and gradual, so skiing up and down it was much more fun!
Staying Healthy
This is very important. If you get sick from the food or water, you can get whacked out for the rest of the trip. Be cautious with what you eat, especially journeying into the mountains. A simple cold or flu can take much longer to get rid of when you’re living at 5000 metres.
Here’s some tips:
Don’t get sick! (obviously!). It’s best to be very cautious with what you eat and drink. I try to eat predominately vegetarian on the way into the mountains.
Buy one of these water filtration systems so you don’t create loads of plastic waste by drinking bottle water, and read this: Raphael Slawinski’s blog on Staying Healthy
Bring:
A decent washbag.
Vitamin tablets. There probably won’t be much fresh fruit and vegetables in Base Camp.
A good first aid kit (speak to a Mountain Medicine doctor beforehand). Include: lozenges, moisturiser, baby wipes, Antibiotics like amoxicillin and ciprofloxacin (in case you get the shits/worms/Giardia etc - these have all happened, but thankfully not to me!), Pain killers, anti-inflammatory pills, Aspirin, Dex, Diamox, lots of hand sanitiser, a first aid instruction book or manual, steri strips, bandages, slings, tape, vaseline gauze or moist gauze, iodine, scissors, surgical gloves, plasters, wound dressings, tweezers, extra plasters/antiseptic cream/painkillers for porters (although even better is to leave it with the local doctor with clear instructions after your trip), etc etc etc. Bring lots, and ideally ask a doctor back home to answer any of your questions you may have whilst you’re away.

Matt Glenn loving the acclimatisation life. Don’t forget the speaker!
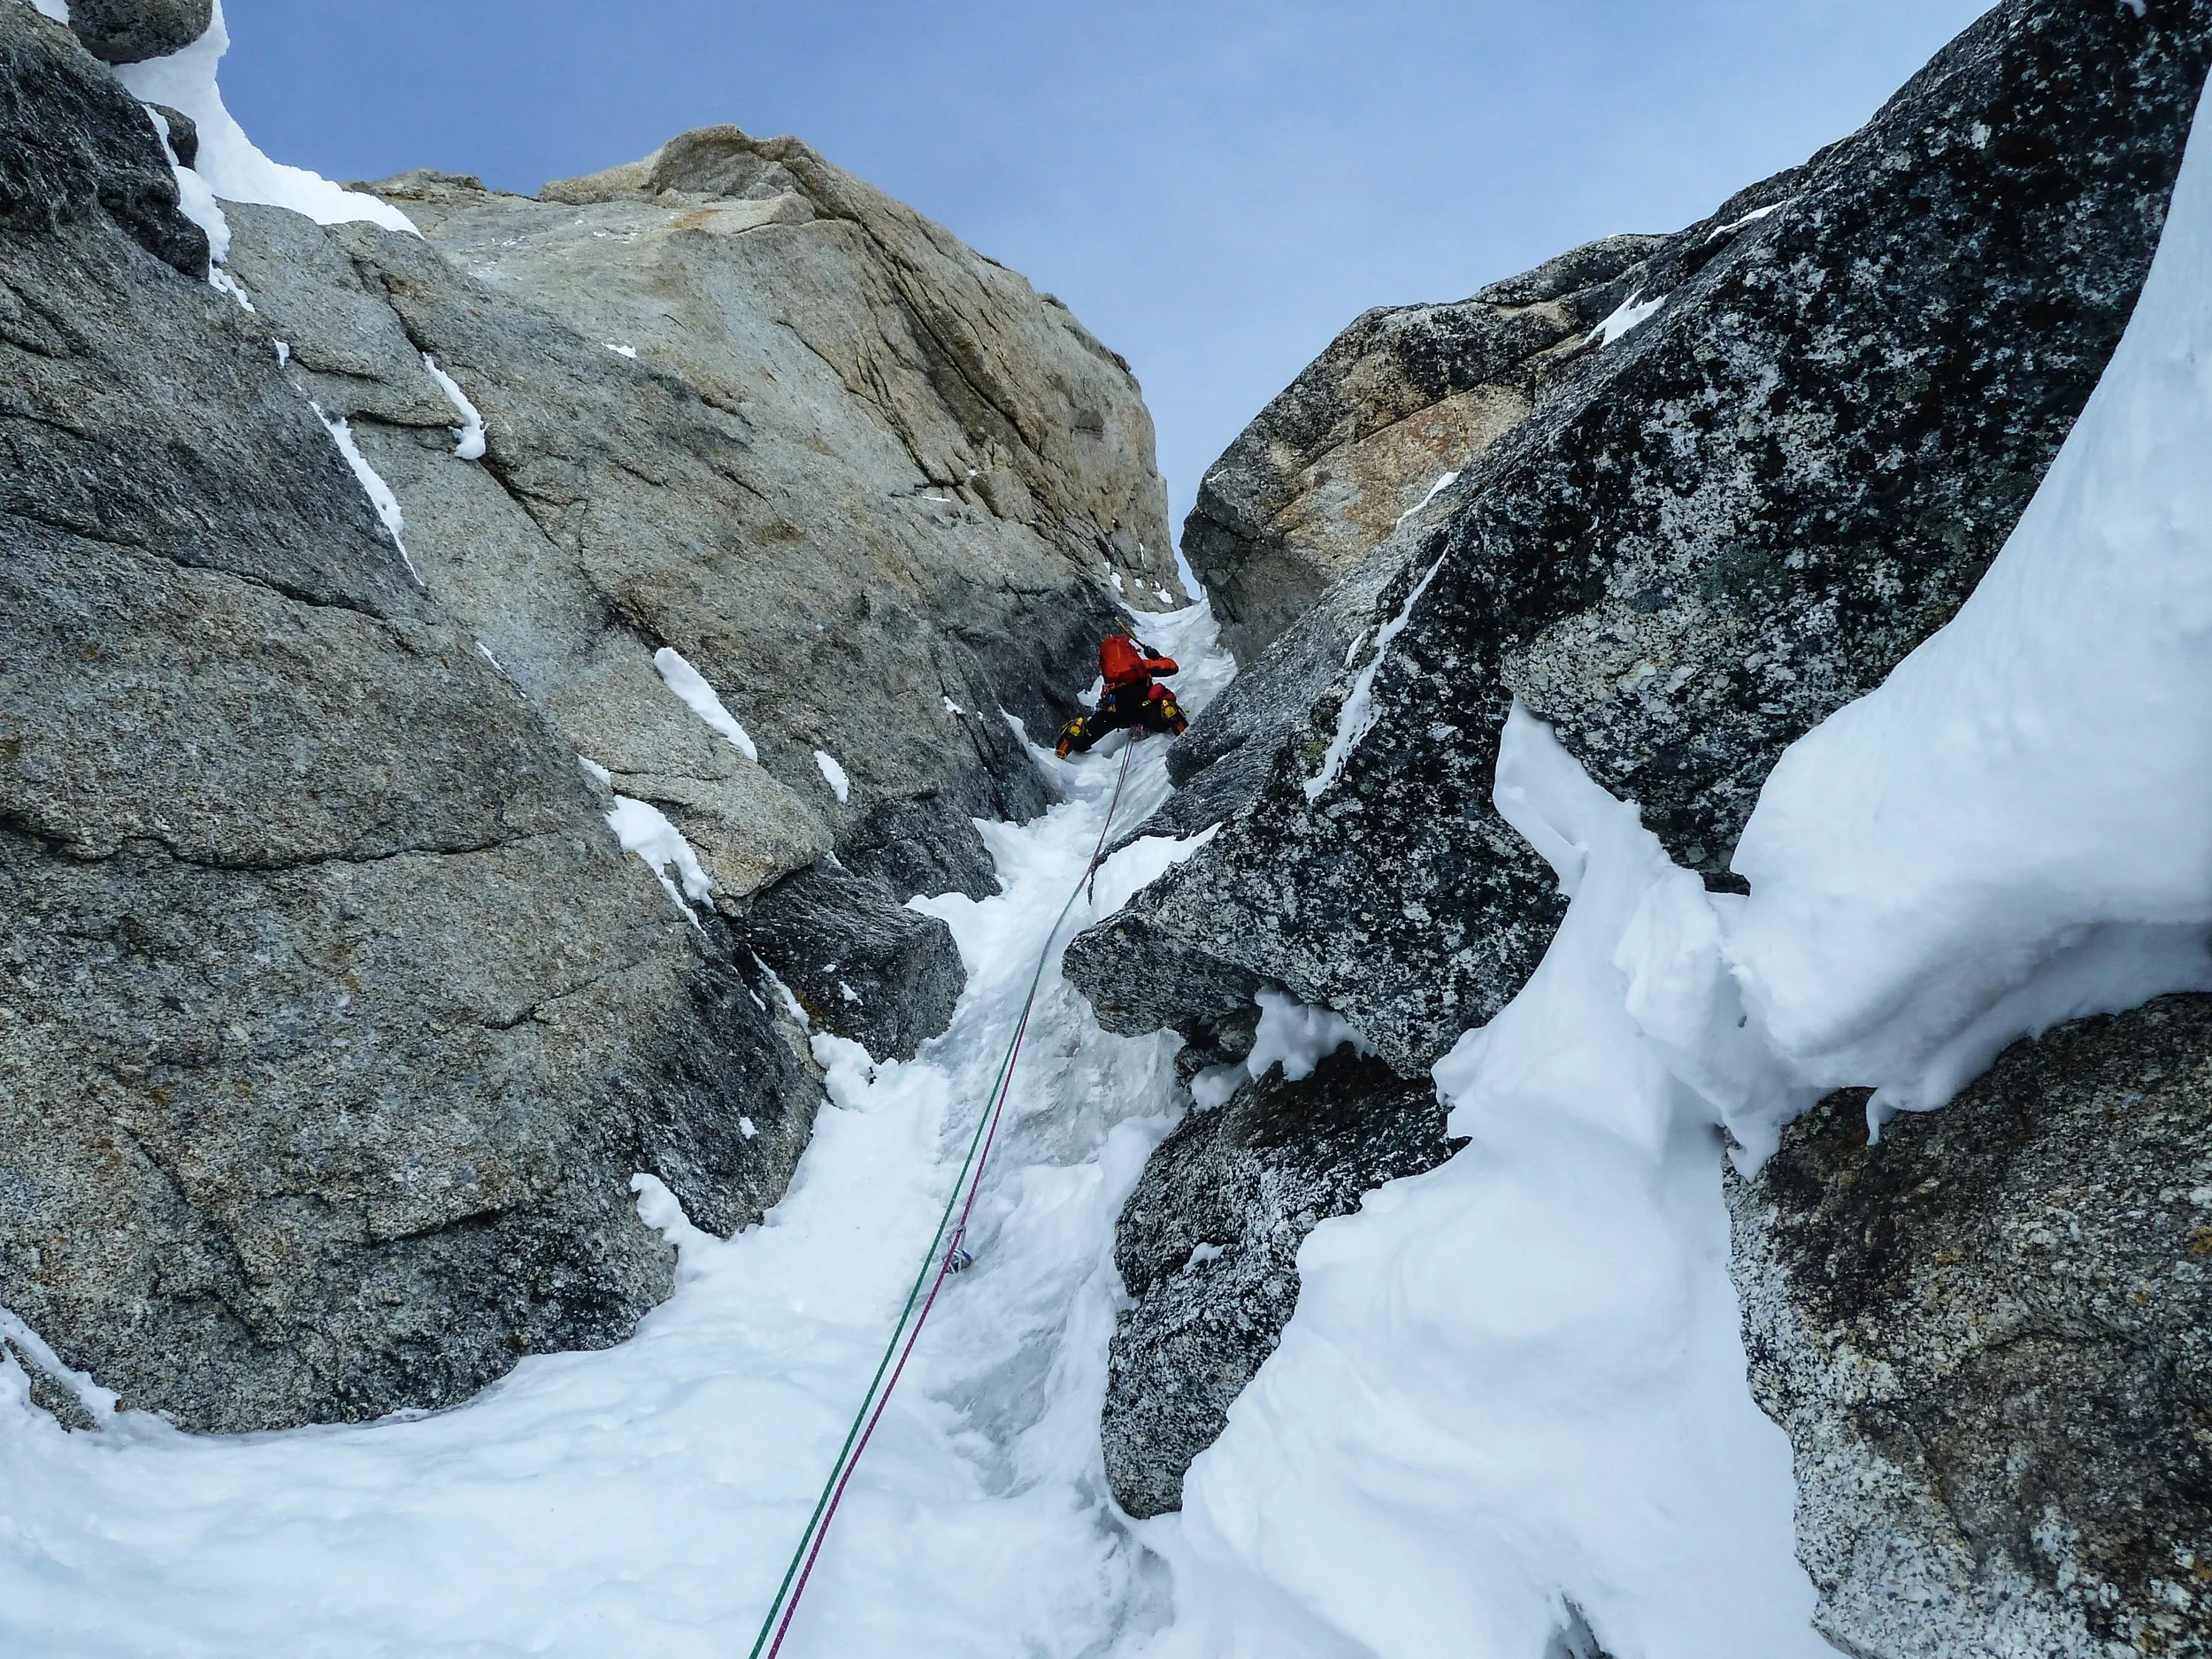
Climbing
The good part! Climbing squeaky nevé high above the surrounding peaks, slotting your picks into cracks and cranking on good granite; pulling on your rock shoes and firing the crux! This is what it’s all about. Fingers crossed you get a good weather window, you’re acclimatised, you have a good team and are psyched by your hard objective. But…
Your climbing style should adapt to the mountains. This isn’t the Alps, where you start from a cablecar and race up the route in a few hours. This is the real deal, where you might have a big approach/descent, multiple days of climbing at altitude, mixed weather and zero chance of rescue. Act accordingly.
In the big mountains, take it easier. Obviously it depends on the route you have in mind, but in general your mentality should not be ‘fast and light’ in the Greater Ranges. Instead, try ‘Fast-ish and Light.’ You might only get one opportunity to climb the mountain, and you’ve travelled all this way (and paid all this money) to be here. So, slim down your pack, put lots of gear in, don’t push it too much, build good belays, back up your rappels, check on your partner, start looking for a bivy site before dusk, keep an eye on the weather, don’t drop things…
Belays - if in doubt about where to go, build a belay. It gives you time to stop, assess where to go, and replenish the rack. It’s also a good idea if you think the next section will do a big traverse or looks hard. If you’re n0t sure, can you use any photos you’ve taken of the face to help you decide? Equalise everything with a big sling (there are ways to equalise everything with an easy-to-untie knot). Keep yourself on one side of the belay (if you’re leading off to the left, put yourself on the left side of the central point), put your pack in the middle, and the second’s ropes on the other side. This way you should avoid rope tangles. Put lots of gear in, and make sure your belay is as solid as possible.
I often belay the second with a Petzl Nano or Micro Traxion. You should read Petzl’s information about doing this, and take appropriate caution. It’s an incredibly efficient way of belaying, but be extra careful if the ropes are icy, dirty or wet. A Petzl Attache carabiner has space for two Traxions.
Try to climb fast in a ‘smooth but not rushing’ speed. The role of the second is to climb the pitch as fast as possible. Recover the gear on a shoulder sling so you can pass it all to the leader at the belay. Communicate with your partner if possible - if you’re building a belay, tell your second, so they can start getting ready to climb. You can add security when moving together by using Petzl Traxions.
Focus on your footwork when climbing. You can place your crampons on surprisingly small edges, so be precise and use your feet well. Break the route down to one pitch at a time. Shake out and assess the pitch where possible, milking the rests and putting in a cluster of gear before a crux section. Don’t pass a gift (i.e. if there’s a good placement, use it!). With my axes, I’ll search for cracks or edges and test them. Once I’ve found the best one, I’ll test it thoroughly, moving the pick gently. Once I consider it ‘good,’ I’ll commit to it and move upwards.
Ropes - generally, two ropes are safer than one (e.g. two of the Petzl Paso Guide 7.7mm). You can avoid rope drag, they’re easier to use when abseiling, and you’re not in too much trouble if a rope is damaged. However, if you’re climbing something steep, you’ll appreciate hauling the packs. It’s much more efficient and comfortable for both the leader and second to climb without packs. You could use double ropes and a tag line, but the lighter system is to have a single and tag (e.g. Petzl Volta Guide (9mm) and Rad Line (6mm)). A single rope is also easier to manage at the belays. In general, I use the single and tag system most when alpine climbing. Pay attention to some tag lines, because they don’t work so well if you do a lot of rappelling (they’re slick so slide through the belay plate more, therefore moving your knot, and you can only use them as a pull-line which is a pain). A Petzl Nano or Micro Traxion is essential. I almost always take 60 metre ropes.
Rack - A huge amount of weight can be gained or saved with the rack. If you take it, you might not need it, but if you don’t take it, you’ll wish you had (sometimes)! Think about how much climbing you’ll do, how long and gear-intensive the pitches will be, and the descent. Will you leave lots of gear in rappel anchors? What is the rock - granite, which takes lots of cams, or limestone, which takes lots of wires? If you’re not sure, it’s better to take a bit more rather than a bit less.
Rock shoes can be very useful, making a tenuous slab pitch or smearing in cracks a completely different experience. They are, however, extra weight, and ideally you want a bit of sunshine! I’ve used them at about 6300 metres on Koyo Zom (Pakistan) and they were great; I’ve also used them (occasionally) in the Alps in winter.
Scope the route with binoculars. Take lots of photos of it and draw the face beforehand, marking potential bivies if possible. Having something to refer to makes things feel less daunting. Bring a paper topo that you’ve drawn in base camp in a clear plastic bag if you can.
Check out the descent of the route if possible. A good tactic is to mark/GPS track the descent, and even leave a cache of food and gas. Have several options for a descent - back down the route? Into a different valley? A ridge and then some abseils?
Bailing or the descent is an essential part of alpine climbing. Remember, if you’re trying ambitious things, 50% of the time it doesn’t work out for whatever reason. Bail well, don’t scrimp on gear, and be careful. I use 5mm or 6mm cordelette to equalise anchors but it’s reinforced, like this: Beal Backup or Petzl Pur Line.
Uisdean Hawthorn charging on the Moonflower (north buttress of Hunter, Alaska).
Sleeping
Often, part of a big route is being good at sleeping. A night in the mountains can be nice, or it can be gross. It’s also very time and weight inefficient, so firstly consider if it’s even necessary to bivy (look at the ‘Night Naked’ style of climbing big mountains via technically straightforward routes in the 1980s). However, if you want to climb hard in alpine style in the Greater Ranges, at altitude, you’ll probably need to bivy. In which case:
Find a good system which works well. It depends on many factors, but chose the best setup depending on your experience and what you expect to find on the route. This might include a bivy bag, tent, shovel, tarp, just a sleeping bag, just insulating jacket and pants, just a stove, or nothing… I usually take a single skin two-person tent and aluminium poles, a foam mattress each, and a double sleeping bag.
Sleeping bags are nice. You could share one between you if it’s just one night, or zip in a Pizza Slice shape of simple fabric to enlarge it, or (even better) a Double sleeping bag. It’s hard to say for sure, but up to around 6000 metres I take a Mountain Equipment Firelite bag (-9 degrees C) and above that, an ME Fireflash (-14 degrees C). I can highly recommend a double sleeping bag. Compared to each person having their own sleeping bag, it’s double the warmth and half the weight. I rarely have a problem with my sleeping bag getting wet on multi-day routes, but I know some do and prefer water-resistant outers.
Single-skin tents work well, providing a much-needed shelter and happy place on big routes, particularly if the weather’s bad. Although I have both aluminium and carbon poles, I rarely take the carbon poles outside of the Alps. They’re an extra risk, and since they splinter easily, I usually end up with bits of carbon in my hands. I rate the Samaya prototypes I’ve been testing, or there’s the old faithfuls BD Firstlight or Simond Makalu. Keep the door open to minimise condensation. I don’t think there’s a significant difference in breathability between any of the aforementioned tents. Ultimately, you will have condensation inside the tent from your breathing, so it’s best to open the door and vents as much as possible.
The BD Firstlight (or similar) is good for two people, but snug for three (in that case it’s sometimes better to use the BD Skylight or Simond Makalu because they have more space). You can better use the space in a Firstlight if you have three individual sleeping bags and sleep ‘top and tail.’ But it’s preferable to have a double (or even a triple? do these exist?) sleeping bag, which makes top and tailing difficult.
If you plan to spend many nights on the mountain, you can sometimes take less clothes, since you’ll be spending many hours/nights in your sleeping bag. Also consider if your route or bivies will be in the sun(!).
Bivy well. Some people start looking for a bivy space from mid-afternoon, since it’s better not to pass a gift. After a good night’s sleep you’ll be fired up; after a bad night you’ll be looking down at the ground. Try to find a comfortable place to sleep where you can lie down; clip everything in; get a hanging kit for your stove so you can melt snow efficiently; have a lightweight cover to go over your head, like a tarp or tent; use a dyneema snow hammock to enlarge a poor bivy on an icefield; get a string hammock if necessary (on the Jorasses they can be useful); get creative with ideas etc.
Use an empty freeze-dried sachet as a makeshift bath for the gas canister/stove, and occasionally add hot water to keep the canister warm. You’ll have the cut the sachet so it’s about the same height as the canister. By keeping the canister warm and burning strong, you will save hours of your life waiting for the snow to melt. The Trek n Eat sachets are the right size to fit around most gas canisters. I usually bring a hanging kit for my stove.
Collect your empty freeze-dried sachets after a route, clean them out, and make your own breakfasts. I add some oats, chocolate milk powder, nuts, coconut, seeds, etc. Get creative.
Test some freeze-dried meals and get the ones you like. I like most Firepot, Lyo and some Trek ‘n’ Eat ones. Some people make their own: mash potato, cheese, salt, milk powder, salami, dried mushrooms, and cheese if eating soon; or try cous cous, sun-dried tomatoes, a stock cube, raisins, nuts, chorizo, olive oil and dried soya proteins.
A long spoon (like this one) makes it practical to eat out of a freeze-dried sachet.
Hot tea/liquid is a nice way to get warm and hydrate. I like the Starbucks Via coffee sachets or Taylor’s Coffee Bags, but I’m sure there are others.
When melting snow with the stove, always keep a bit of water in the bottom of the pot to prevent burning it.
Take lots of lighters!
I use an MSR 2 litre Dromedary, because it’s light and has a much greater capacity than conventional bottles, and makes for a nice hot water bottle. Careful - the lids aren’t the best and you don’t want it to leak in your sleeping bag! (See photo below).
Use a lightweight plastic tub as a cup and to pour snow into the stove. This stops your hands getting wet and cold. I use a tub on a bivy at the base of a route but rarely on route. (See photo below).
The green tape which covers most of my gear is called Betrafol, or Rissan by Siga. It’s for sealing house insulation and sticks like sh*t. It’s the best and most affordable gear repair tape I’ve used, is waterproof and windproof, and survives being washed/tumble dried.
Once at the bivy, change your socks for a dry pair (it’s a great feeling!) and put your old socks to dry in the sleeping bag or in your jacket. I often change socks after the approach, because they’ll get sweaty and cold for the rest of the day.
At a bivy, put your mitts on your feet to keep them warm overnight (if you’re not sleeping in your inner boots because they’re damp). It looks ridiculous but works well.
Take a good headtorch and consider an extra battery. Put your headtorch on your helmet before it gets dark (obviously!) and be careful not to drop it, taking it off during the day. Conserve the battery by turning it to the lowest setting (or off) when you don’t need it.
Have your food organised into days and put them in separate stuff sacks, to keep life organised when you’re living out of backpacks.
At around 4000 metres, for two people, a medium-sized gas canister (~230 grams) lasts about 1.5 days (i.e. an evening, a morning, and an evening).
At around 6000 metres, for two people, a medium-sized gas canister (~230 grams) lasts about 1 - 1.25 days (i.e. an evening and a morning).
At around 6000 metres, for two people, a large gas canister (~450 grams) lasts about 2.5/3 days.
The above three bullet points rely on you being attentive to the stove, and trying to keep the gas canister warm, either with a freeze dried sachet water bath (see above) or occasionally using your hands.
However, bring more gas than you think! It’s better to have a bit more than a bit less.


Speak to other climbers. Paul Ramsden has lots of experience and says, ‘take warm boots and make your climbing gear as light as you can. 200 grams less in climbing equipment is another dehydrated meal, which means you can stay on for another day.’
He also says, ‘take more food and gas than you think; there might be a storm, and you’ll run out otherwise! Accept the bad weather and get your book out! [I take an iPod Shuffle].
Take a Light My Fire Scout 2 (flint striker) because its better than lighters, particularly in bad weather. Be really good at making v-threads.
‘A classic mistake for many teams is to bivy about 500 metres below the summit, and then leave your bivy gear in order to tag the summit. Unfortunately, often you encounter an unexpected hurdle (such as a tricky gendarme, or the climbing is harder/slower than you thought), which means you have to turn back without reaching the top. It’s usually better to take your stuff with you.’

Deciding to stop early in the day and treat our climb from the north side of Latok 1 as a ‘fast marathon’ was important. Photo: Luka Stražar
The Mind
‘The mind rules the body.’ Alpine climbing is very mental. Often, you might stop because of psychological reasons, like stress, the possibility of bad weather or a bad bivy. You might not bail because of technically-difficult climbing. Again, Paul Ramsden says, ‘a big alpine route is about 25% ability, 25% luck and 50% psychological [I’d say slightly more ability and slightly less luck but I largely agree!]. People get freaked out; you’re climbing a big mountain and you’re on your own. There is no real rescue. So you need to be comfortable with where you are. Take it easy, enjoy your holiday. Try to feel relaxed in the mountains; a strong psychological mindset is hugely important. This takes years to cultivate, but work on it.’
Go climbing in bad weather, which makes you less afraid of the wind. Climb in the dark, which makes you less afraid of the night. Bail off a few things, which makes you good at finding and building abseil anchors. Climb with people who seem to be mentally stronger than you, see what phases them and what they can handle. Learn and apply.
Understand why you’re motivated and what you’re afraid of. Imagine you’re high on a big face - why would you want to keep going? Why would you want to go down? What reasons do you find?
Read the sections about the mind in Mark Twight’s book Extreme Alpinism, and Steve House & Scott Johnson’s Training for the New Alpinism.
Timings
I plan for about 6-7 weeks on an expedition, which is roughly:
1 week each end for travel,
2 weeks for acclimatising,
2 weeks to allow for a weather window and climbing time.
Paul Ramsden goes for a shorter amount of time, and shared this programme with me for a trip to Hagshu in India:
‘Normally I don’t go for too long (4 weeks) and I use the same schedule:
Get to BC (around 3500 - 4000m)
Only spend one night in BC
The next day, with a weeks worth of food, we walk up the valley and acclimatise, and check out the objective(s). For India, we walked underneath Barnaj and then up a peak opposite, gaining 300m per day. We slept for two nights at about 5700 metres, then went back to BC. A week had passed.
At BC we binge-ate, then set off up the route!’
Expedition Reports and Articles
Here’s some information and expedition reports for some of my previous trips:
Alaska - Revelations Range - New route (Fun or Fear) with Uisdean Hawthorn in 2018
Pakistan - Choktoi Glacier - New route (Latok 1) with Ales Cesen and Luka Strazar in 2018
India - Zanskar Region - ‘No climbing’ with Will Sim and Uisdean Hawthorn in 2018
Pakistan - Hindu Raj - New route (NW face of Koyo Zom) with Ally Swinton in 2019
Pakistan - Pumari Chhish - SE ridge attempt with Mathieu Maynadier in 2021
Nepal - Khumbu Region -New route (NE Pillar of Tengkangpoche) with Matt Glenn in 2021
Country-Specific Information
Nepal
Perhaps the easiest (in terms of entry visas, permits and paperwork) and quickest country to travel around. Everything is well set-up and organised, and can be done quite last-minute. Visas can be obtained on arrival. Tea houses are amazing and common, there’s no dispute about porter loads, there’s cell service in many areas, agents can sort everything for you (and you might not even need one…?!), and there shouldn’t be unnecessary delays with the bureaucracy or paperwork.
The monsoon season (summer) goes from east to west, so bear this in mind. There’s ‘usually’ settled weather in October and November, although who knows what’s normal with the climate these days!
Getting a Trekking Permit is the easiest option; you’ll still need a trekking guide, but you won’t have to pay something like $1500 for a Liaison Officer. I think the trekking permit is only for peaks under 6500 metres. Remember, if you’re caught abusing the system Nepal may ban you from future entry.
Example: For Tengkangpoche (Thame valley, Khumbu region):
Theoretically, can be good pre-monsoon (less snow) or post-monsoon (more settled weather).
Fly to Kathmandu. Ministry briefing. Internal flight to Lukla. Trek for two days up the Everest trail, then one more day to Thame village/Thengbo tea house.
Acclimatise by doing day hikes to about 5000 metres, then spend 3 nights camping progressively higher up the Tashi Laptsa Pass (finally spending two nights around 5600 m).
Return to tea house, rest, send!
Agent: Dawa at Dream Himalaya Adventures
Costs:
Agent fees for in-country travel, food, accommodation, porters, peak permit/paperwork, trekking guide, tea house food and accommodation etc: about £3000 per person
International flights: £900 per person
Freeze-dried food/bars/luxuries, gas canisters and extras: about £200 per person
Doing a route: priceless!
Note - this is just one of dozens of amazing areas in this country. there’s also the Langtang, Rolwaling, Annapurna region, Manaslu region, Far West etc

Nepal can be very comfortable if you stay in a tea house.
India
This wonderful country goes from the Himalayas in the east, to Karakoram in the west. There can be difficulties getting a permit for some regions (e.g. close to China or Pakistan). It has some of the world’s coolest peaks and fascinating cultures.
India is the world leader in bureaucracy and paperwork. Expect a lot of faff. You could apply for an ‘open’ peak (i.e. one that’s on the Open list at the Indian Mountaineering Federation), as this will significantly reduce your logistics. This means you won’t have to get special government permission to get a Closed peak.
Remember that satellite phones aren’t allowed.
Example: For Hagshu/Barnaj (Zanskar/Kishtwar area):
Theoretically, can be good pre-monsoon (less snow) or post-monsoon (more settled weather).
Fly to New Dehli. Internal flight to Leh, then a day (or two?) of driving to get to the last village (Agshu). Then walk for a day to get to BC.
Post-monsoon (autumn) is probably the best time - it’s not likely to be splitter weather, but it’s not likely to be fully bad, either.
Acclimatise by walking up the hills behind/around BC to scope your objectives. Sleep around 6000 metres.
Wait for good weather. Send! (However, we got heavy snow whilst acclimatising which effectively ended our trip).
Agent: Kaushal (‘Above 14000ft’ agency) who organised everything.
Note - this is just one of dozens of amazing areas in this country.

India has cool mountains and yaks. Photo: Uisdean Hawthorn
Pakistan
An incredible country with high-quality granite peaks, a rich and friendly culture, a lot of poor but welcoming people, and (historically) the cheapest option out of the above three countries.
You only need a Trekking Permit for peaks below 6500 metres (!), although there’s talk of reforming the permit system. Getting a visa can be a faff (but is possible online).
An agent is recommended.
Generally, summer is the best time to go (July and August).
Example: For Latok 1 (Choktoi glacier, Askole region):
Fly to Islamabad. Internal flight (or long bus journey) to Skardu. (For more central mountains: Gilgit. For more westerly mountains: Chitral).
Approach to BC (four days walking)
Base camp at 4500 metres (on glacial moraine)
Acclimatise by climbing nearby non-technical peaks and sleeping up to 6100 metres.
Rest, eat curries, send!
For Koyo Zom in the Chitral region, you drive from Islamabad to Chitral (one day), drive north for a couple of days, walk in to BC for half a day (and camp on nice grass), acclimatise by cragging the route, then rest in BC.
For Hunza region, you drive to Gilgit, then Karrimabad, then Hisper village, then walk in to BC for three days (nice grass), then acclimatise on nearby peaks, then rest in BC.
Note - this is just one of dozens of amazing areas in this country.

Camping on a moraine works, but grass is nicer. Photo: Luka Strazar
Alaska
This place has really good climbing on quality mixed and ice lines, often above a flat glacier and chilled approaches. The rock is usually very good granite, but the weather has a reputation for being mixed! Flying into the mountains in a ski plane is really cool and easy, plus it gives a good sense of scale. However, living on a glacier is pretty hardcore: it’s quite cold and you have to be organised with your food, tents, melting snow, daily life, hygiene etc. Sled hauling sucks. Logistics are pretty easy (fly to Anchorage, do a big food shop, get a transfer to Talkeetna, fly into the mountains, etc).
Some useful beta: have base camp boots/wellies which are large and warm. Bring bamboo wands to act as tent pegs, rather than burying plastic bags. A chopping board, stove board, and good cooking set up with two proper White Gas stoves is great (e.g. 1x MSR XGK for melting snow and 1x MSR Whisperlite for cooking). Bring spare pumps for your stoves. You probably don’t need a giant snow stake/picket. Talkeetna Air Taxi are great to fly you in and out of the mountains. Bring some fresh food onto the glacier for the first ten days. Have one tent for cooking and one (large and bombproof) tent for sleeping. I’d recommend a TNF VE 25 or Hilleberg Nallo 4GT.
The granite is good but the snow mushrooms are scary - be careful. Skis are essential, as is a basic ability of ski touring. Snow shoes aren’t nice. Take lots of spare parts, such as crampon straps, picks, tat and webbing, a basic multi-tool, camera batteries, baby wipes, tent poles, lip balm, lighters, hot chili sauce, cable ties, repair tape… etc etc etc. Once you’re there you won’t have a chance to pop to the shops for anything. I use a 30W Big Blue or Anker solar panel and a basic battery pack. Bring books to read if you have a 5-day storm(!). Bring more than three pairs of boxers and socks. Get an MSR Reactor stove - it’s much more efficient than a Jetboil in the cold, more wind-resistant, and better at altitudes. It’s a bit heavier but is worth it.
Read people’s blogs (e.g. Will Harris and Alistair Robertson doing Deprivation and take notes).
Flights, Visas, Permits etc:
Ideally, schedule your international flight to arrive in Anchorage at 8am. Get your food shopping done straight away in a big supermarket and arrange a transfer to Talkeetna that afternoon. Fly onto the glacier (weather permitting) the next morning. This minimises faffing and maximises time in the mountains. Alternatively, if you’re not pressed for time, get over the jet lag in Anchorage for a couple of days and do your shopping then.
The main expenses for an Alaskan trip are international flights (check if any companies let you have a free ski bags; Turkish Airlines used to but not any more); and Talkeetna Air Taxi flights onto the glacier (e.g. $610 pp, return, including 1 x Coleman gas, 1 x sled, 1 x Base Camp Fee), and food on the glacier (you always have more than you need, but it’s better that way). Fly with TAT because they’re ace, and can operate when other companies can’t due to bad weather.
Remember you will need to get a permit for the Denali National Park and this must be done three months(!!!) before your trip. Check the website. Don’t forget to apply for an ESTA before entering USA. On the subject of planning in advance, work out how much food you eat per day and that’;ll give you a guide. For example, how much porridge oats does a team of 3 need for 3 weeks on the glacier? Well, 150 grams per person per day = 450g/day = 9.45kg…! But you can discount five mornings for fried cheese bagels and five mornings for bacon wraps, so that’s… you get the idea.
Go to The Hoarding Marmot store in Anchorage when you’re there - it’s a great gear store. Say hello to Dana (Maddog!), Magpie and Rosco from me! Legends!
Tom Ripley’s report, route blog and gear blog are useful about climbing the Cassin Ridge. Denali is a cold mountain! I have descended the Wickwire/Seattle Ramp twice to access the south face, which was efficient.
If the West Buttress on Denali is your objective, a three week trip should be adequate. You can travel very light since you’ll inherit food and fuel from other teams going down from 14k Camp, don’t need any technical climbing gear, should take a Megamid teepee for cooking, and can get Verizon network phone signal at 14k camp.
Here’s some of my published writing, blogs and videos.
I’ve found the New Zealand Alpine Team kit list useful to work out how much food to bring, but we should’ve halved everything!
Example: For Cassin Ridge on Denali
Fly to Anchorage. Big food shop. Transfer to Talkeetna.
Fly into the mountains to your relevant base camp
Either acclimatise or scope objectives
Climb!
Fly out, get drunk on one beer in Talkeetna. Return to Anchorage.

Ski plane approach!
To Do Beforehand
Ok, you’re motivated to go on a trip (one of the most important things!), you’ve found a partner and objective, you’ve got the time off, you’ve got some grants, you’ve begged and borrowed some kit, and you’re off! Here’s a few things I do in the weeks beforehand:
Check logistics. You know where you’re going, how to get there, what to expect…
Plan and book first day and night - particularly for trips to Alaska, where you arrive in the middle of the night. A cheap motel is best booked in advance.
Book any transfers/journeys - particularly for Alaska (book shuttle to Talkeetna etc).
Flight logistics - check your flight connections etc.
Check baggage allowance - for international flights (can you sweet-talk extra? and for ski-plane flights in Alaska).
Bring passport photocopies, boarding passes, passport photos - particularly for giving to an Agent
Visas - online? send off? ESTA for USA and Canada, online for Pakistan/India/Nepal
Local contacts? It’s always nice to see mates if you’re passing through.
Covid stuff - have vaccine copies, check travel restrictions etc
£/$/€ - get local currency and/or US Dollars. Check if I have any.
Gear - order energy bars, freeze-dried meals etc.
Pack kit. Check your Google Sheets.
Consider luxuries but don’t go mental
Sync Garmin InReach, turn on, get subscription, check it works, text !
Download podcasts/music/check offline stuff works. Download the FATMAP area maps
Contingencies
For Alaska: make a meal plan and buy loads of food in the supermarket.
That’s it, enjoy! Tell me if I’ve forgotten something (tomlivingstone8 at icloud.com)
Note: climbing and mountaineering are activities with a danger of personal injury or death. Participants in these activities should be aware of and accept these risks and be responsible for their own actions. The information in this article is not advised, liable or endorsed, and you should always seek expert tuition before climbing and mountaineering.